react-native-vector-icons 的使用
在 React Native 项目中会经常用到 react-native-vector-icons 来显示小图标,这里介绍如何在 iOS/Android 上使用该库。
假设我们已通过 npx react-native init RNIconsExample --template react-native-template-typescript 命令创建了一个名叫 RNIconsExample 的项目。
安装环境
- react-native 0.69.1
- react 18.0.0
- react-native-vector-icons 9.2.0
安装
yarn add react-native-vector-icons
如果使用 TypeScript 开发,则还需要安装 @types/react-native-vector-icons
yarn add @types/react-native-vector-icons -D
iOS配置
用 Xcode 打开 ios 目录下的 .xcworkspace 文件
- 将字体文件添加到项目
1、右击选择Add Files to "RNIconsExample"...
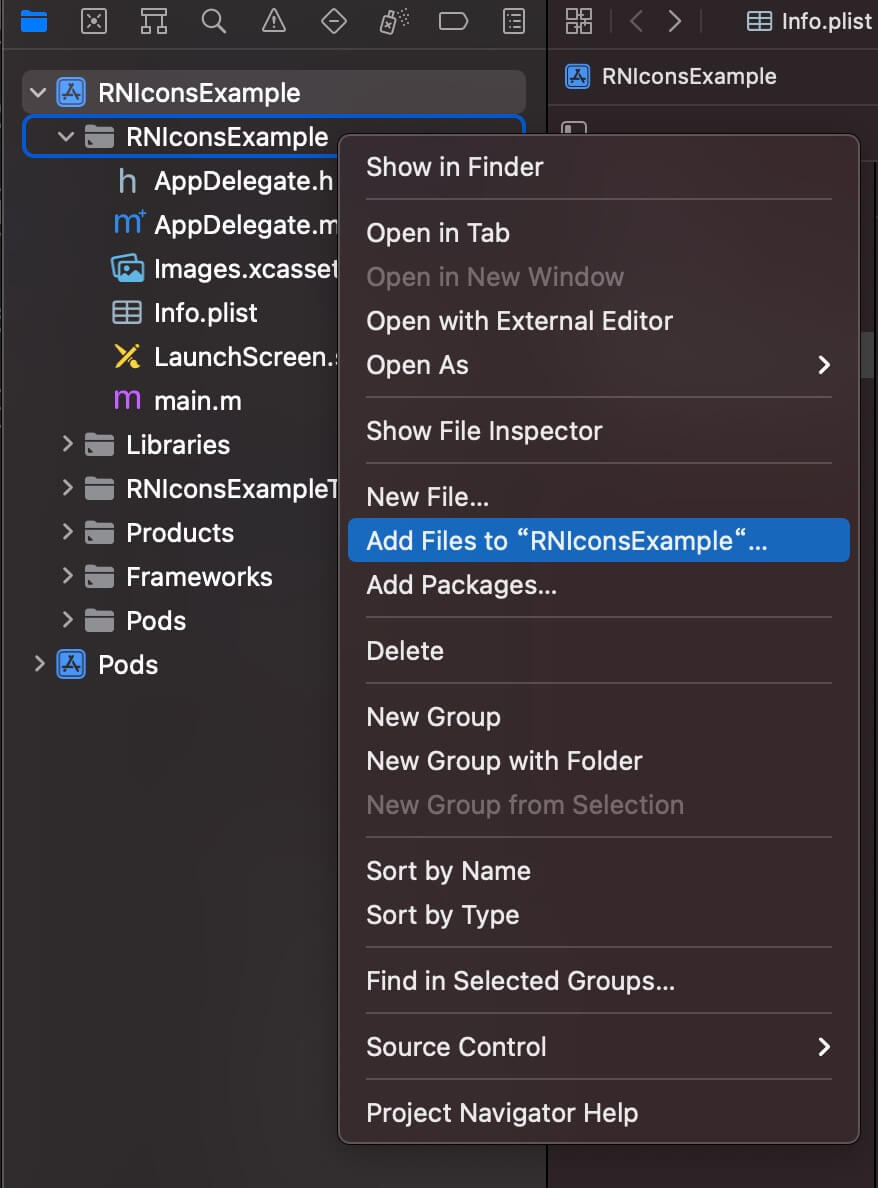
2、选中 node_modules/react-native-vector-icons/Fonts 文件夹,并确保勾选 Copy items if needed、Create groups

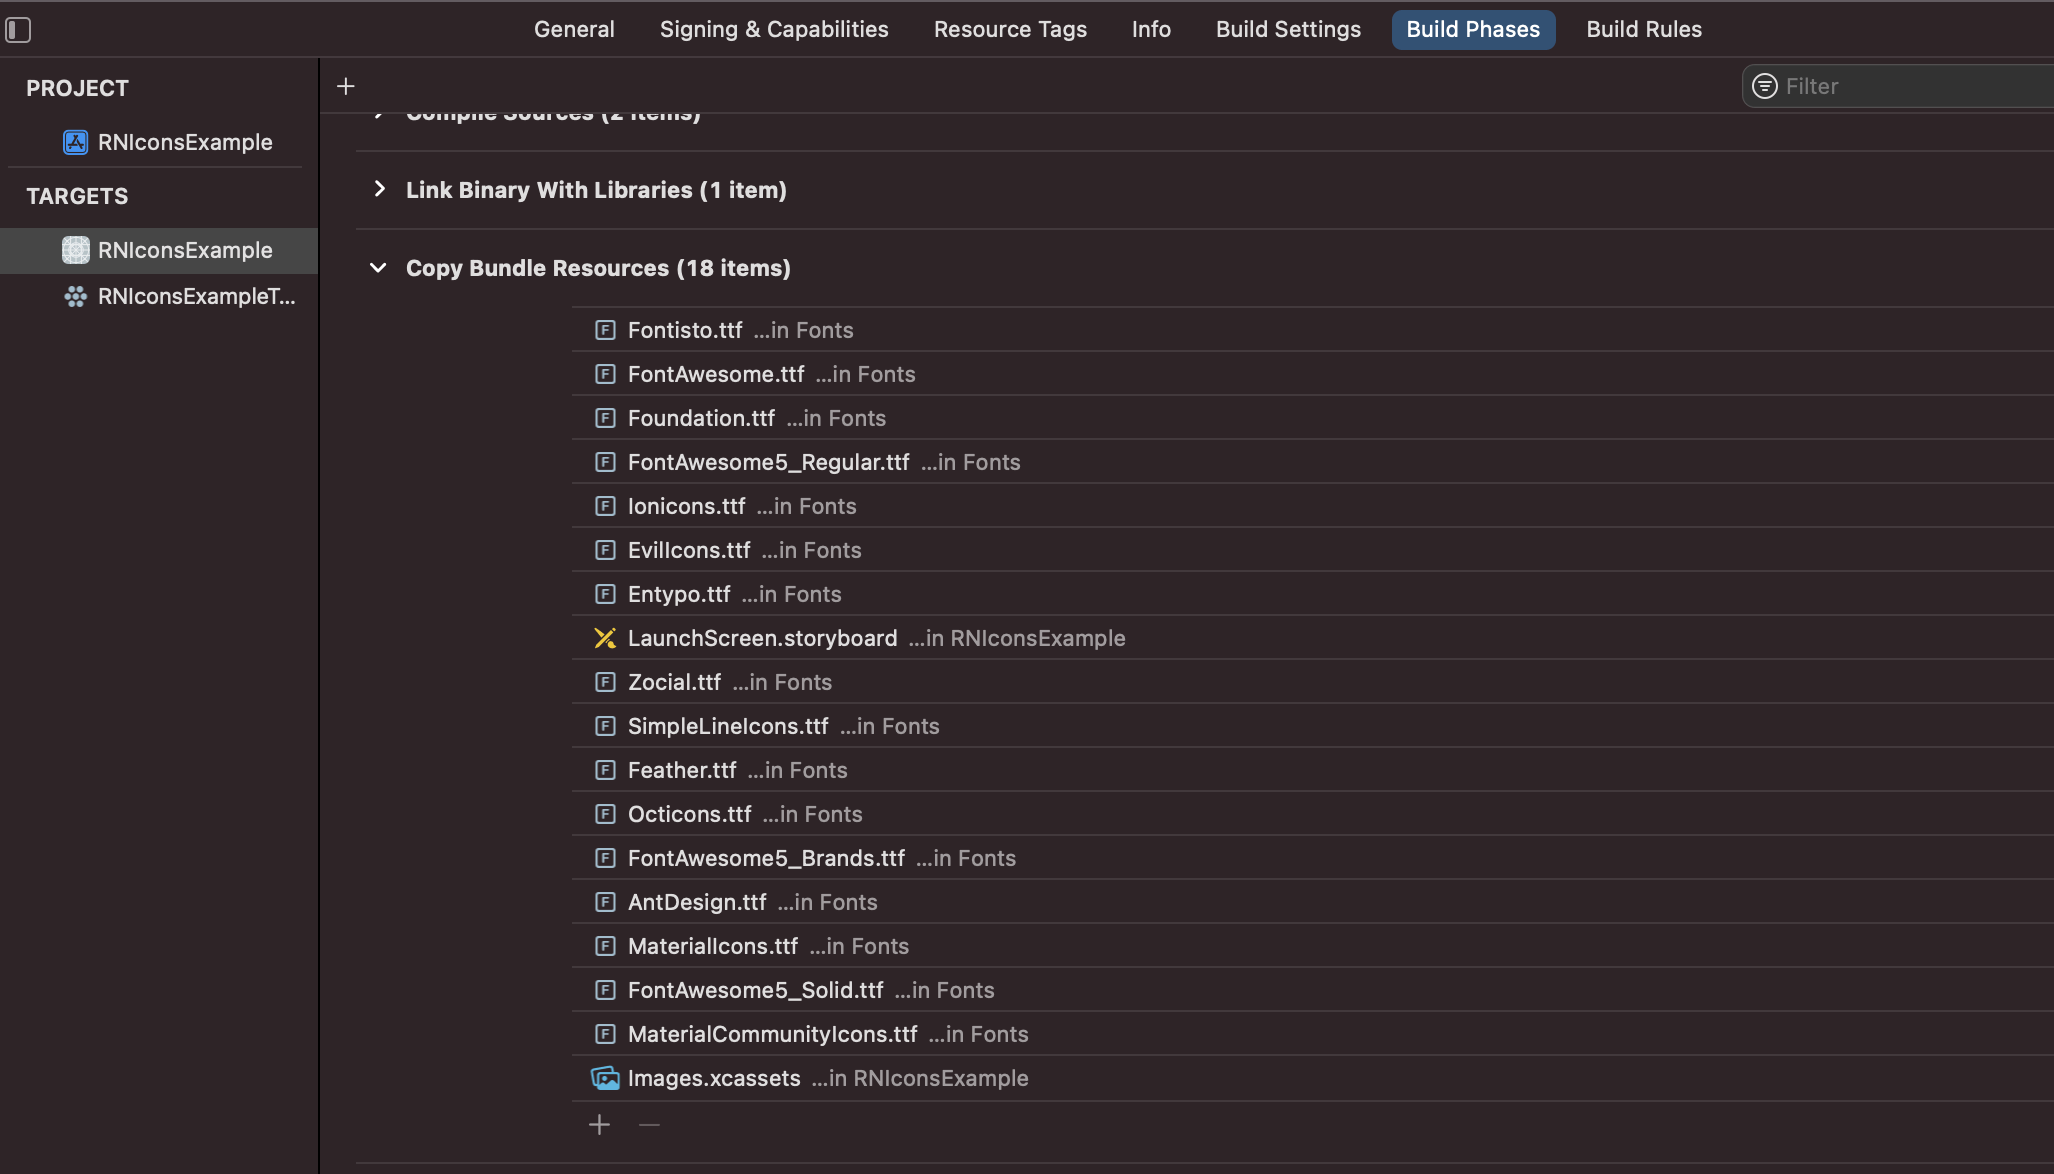
3、在 Build Phases – Copy Bundle Resources 面板中,确保添加了你的字体文件,如果没有引入,则手动添加进去
- 在
Info.plist文件上右击,选择Open As–Source Code,以源码方式打开该文件,然后把下面的配置信息粘贴进去
<key>UIAppFonts</key>
<array>
  <string>AntDesign.ttf</string>
  <string>Entypo.ttf</string>
  <string>EvilIcons.ttf</string>
  <string>Feather.ttf</string>
  <string>FontAwesome.ttf</string>
  <string>FontAwesome5_Brands.ttf</string>
  <string>FontAwesome5_Regular.ttf</string>
  <string>FontAwesome5_Solid.ttf</string>
  <string>Foundation.ttf</string>
  <string>Ionicons.ttf</string>
  <string>MaterialIcons.ttf</string>
  <string>MaterialCommunityIcons.ttf</string>
  <string>SimpleLineIcons.ttf</string>
  <string>Octicons.ttf</string>
  <string>Zocial.ttf</string>
  <string>Fontisto.ttf</string>
</array>
- 在项目根目录下新建
react-native.config.js文件,写入如下内容
module.exports = {
    dependencies: {
        'react-native-vector-icons': {
            platforms: {
                ios: null,
            },
        },
    },
};
- 更新依赖并重新运行
$ cd ios && pod install && cd ..
$ yarn run ios
Android配置
通过 Gradle 自动构建
推荐使用 Gradle 方式,在构建时自动从库中复制字体文件,保证字体和JS代码都是最新的,平滑升级到新版本。
- 编辑
android/app/build.gradle并添加以下内容:
apply from: "../../node_modules/react-native-vector-icons/fonts.gradle"
以上配置会将 node_modules/react-native-vector-icons/Fonts 目录下的所有字体文件复制到 Android 项目,如果你需要指定复制的字体文件,则添加如下内容:
project.ext.vectoricons = [
    iconFontNames: [ 'MaterialIcons.ttf', 'EvilIcons.ttf' ] // Name of the font files you want to copy
]

apply from: "../../node_modules/react-native-vector-icons/fonts.gradle"
- 重新运行
yarn run android
手动集成
手动集成只需要将字体文件拷贝到指定目录即可,如果您想使用 Icon.getImageSource 函数,则需要进行进一步的配置,具体可以参考官方教程 Integrating library for getImageSource support 这一章节的内容。
手动集成的弊端在于字体文件不会随着库的更新而更新,每次库更新后,都需要手动再次将字体文件拷贝到指定目录。
将 Fonts 下的字体文件复制到
android/app/src/main/assets/fonts,如果没有则自行创建文件夹重新运行
yarn run android
使用图标
首先确定你要使用哪个字体,然后导入对应字体即可(比如我们使用 AntDesign 字体):
import Icons from 'react-native-vector-icons/AntDesign';

<Icons name="home" size={50} color="red" />
在使用图标过程中,我们需要知道库提供了哪些图标,可以从 https://oblador.github.io/react-native-vector-icons/ 这个网站进行快速检索。